PINE64 Pinebook Pro (pine64-pinebookpro): Difference between revisions
MartijnBraam (talk | contribs) |
MartijnBraam (talk | contribs) |
||
| Line 70: | Line 70: | ||
There is also a work-in-progress graphical version of u-boot that can show the boot messages on the built-in display and present a menu for choosing which medium to boot. This u-boot build should also be able to boot | There is also a work-in-progress graphical version of u-boot that can show the boot messages on the built-in display and present a menu for choosing which medium to boot. This u-boot build should also be able to boot | ||
generic ARM64 UEFI linux installations. | generic ARM64 UEFI linux installations. | ||
== Flashing u-boot to the SPI == | |||
This will write a copy of the u-boot from the OS image to the SPI flash chip in the laptop. Once this has been done it will always boot from the SPI u-boot instead of the u-boot on the eMMC or SD card. This u-boot has the option to select the boot medium you want and also supports booting from USB storage. | |||
<source lang="shell-session"> | |||
$ apk add flashrom | |||
$ sudo flashrom --programmer linux_mtd --write /usr/share/u-boot/pine64-rockpro64/u-boot.spiflash.bin | |||
</source> | |||
== Video acceleration == | == Video acceleration == | ||
Revision as of 20:56, 10 October 2020
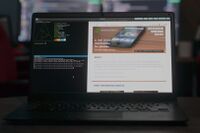
 The Pinebook Pro running Sway | |
| Manufacturer | PINE64 |
|---|---|
| Name | Pinebook Pro |
| Codename | pine64-pinebookpro |
| Released | 2019 |
| Hardware | |
| Chipset | Rockchip RK3399 |
| CPU | 4x 1.5 GHz Cortex-A53 & 2x 2Ghz Cortex-A72 |
| GPU | Mali-T860 MP4 |
| Storage | 64GB eMMC (Upgradable) |
| Memory | 4 GB |
| Architecture | aarch64 |
| Software | |
| Original software | Linux 4.4.x |
| postmarketOS | |
| Category | testing |
| Pre-built images | no |
| Mainline | yes |
| postmarketOS kernel | 5.5.0-rc3 |
| Unixbench Whet/Dhry score | 2742.3 |
| USB Networking |
Broken |
|---|---|
| Internal storage |
No data |
| SD card |
No data |
| Battery |
Works |
| Screen |
Works |
| Multimedia | |
| 3D Acceleration |
Works |
| Audio |
Works |
| Camera |
Works |
| Camera Flash |
No data |
| Connectivity | |
| WiFi |
Works |
| Bluetooth |
Works |
| NFC |
No data |
| Miscellaneous | |
| FDE |
Broken |
| USB OTG |
Works |
| HDMI/DP |
No data |
| Sensors | |
| Accelerometer |
Works |
| Magnetometer |
No data |
| Ambient Light |
No data |
| Proximity |
No data |
| Hall Effect |
No data |
| Haptics |
No data |
| Barometer |
No data |
Contributors
Users owning this device
- Alexeymin (Notes: Running postmarketOS)
- Anjanmomi (Notes: main machine other than x230)
- Bdju (Notes: broken pmOS, needs reinstall)
- BenTheTechGuy (Notes: Running Debian)
- Craftyguy
- Cralex (Notes: M2 Addon, Tow-Boot installed to SPI)
- Danct12
- Flacks
- Harryausten (Notes: with M.2 adapter)
- Jem
- No112 (Notes: arguable daily driver)
- Pbryan
- Pseudomind
- QC8086
- Retourmy (Notes: pmOS with Gnome DE)
- Robert.mader (Notes: Development / Testing)
- Segfault (Notes: Has NVME and no eMMC, not running pmOS)
- Tuxfanou (Notes: Current main computer)
- Vincele (Notes: Void linux (musl), mainline kernel, tow-boot + OS on SD)
- WhyNotHugo (Notes: Running a mix of pmOS and Alpine. WIP home automation Hub)
Serial console
The Pinebook Pro has a serial port on the headphone connector, it's enabled by removing the bottom cover of the laptop and setting the UART switch towards the touchpad.
The uart is 1500000n8
The pinout for the serial connector on the laptop side is:
- Tip: RX
- Ring: TX
- Sleeve: GND
The serial connection is 3.3V
You can also buy the debug cable from PINE64 Store.
Storage
The SD card is /dev/mmcblk2 and the eMMC is /dev/mmcblk0
Booting
The Pinebook Pro boots using u-boot. The bootrom in the rk3399 soc will look for u-boot on the SPI flash chip, then the eMMC and then the SD card slot. It will boot the first functioning u-boot image it can find.
There is also a work-in-progress graphical version of u-boot that can show the boot messages on the built-in display and present a menu for choosing which medium to boot. This u-boot build should also be able to boot generic ARM64 UEFI linux installations.
Flashing u-boot to the SPI
This will write a copy of the u-boot from the OS image to the SPI flash chip in the laptop. Once this has been done it will always boot from the SPI u-boot instead of the u-boot on the eMMC or SD card. This u-boot has the option to select the boot medium you want and also supports booting from USB storage.
$ apk add flashrom
$ sudo flashrom --programmer linux_mtd --write /usr/share/u-boot/pine64-rockpro64/u-boot.spiflash.bin
Video acceleration
The rockchip rk3399 soc in the Pinebook Pro has a hardware video encoder and decoder called hantro, the open implementation supports mpeg2, h264 and h265 but not all profiles are supported on these codecs.
The hardware decoder can be used in any media player that supports libva like vlc or mpv, the extra module that's needed is libva-v4l2-request https://github.com/bootlin/libva-v4l2-request from bootlin. After building and installing v4l2_request_drv_video.so the decoder can be enabled by adding these environment variables:
$ export LIBVA_DRIVER_NAME=v4l2_request
$ export LIBVA_V4L2_REQUEST_VIDEO_PATH=/dev/video1
$ mpv --hwdec video-file.mp4
See also
- pmaports!882 Initial merge request
- PINE64 Wiki page about PineBook Pro