Radxa Zero (radxa-zero): Difference between revisions
Appearance
| Line 61: | Line 61: | ||
Fellow https://wiki.radxa.com/Zero/dev/maskrom#Enable_maskrom | Fellow https://wiki.radxa.com/Zero/dev/maskrom#Enable_maskrom | ||
== Installation == | == Installation == | ||
Revision as of 18:25, 12 February 2023
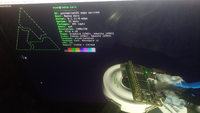
 Diy dock + Radxa Zero + External Display | |
| Manufacturer | Radxa |
|---|---|
| Name | Zero |
| Codename | radxa-zero |
| Released | 2021 |
| Type | single board computer |
| Hardware | |
| Chipset | Amlogic S905Y2 |
| CPU | Quad Cortex-A53 1.8 GHz |
| GPU | Mali G31 MP2 |
| Display | MicroHDMI 2.1 - 4K@60 |
| Storage | None/8/16/32/64/128GB EMMC + SDCard |
| Memory | 512MB/1GB/2GB/4GB LPDDR4 |
| Architecture | aarch64 |
| Software | |
| Original software | Android |
| Original version | 9 |
| postmarketOS | |
| Category | testing |
| Pre-built images | no |
| Mainline | partial |
| postmarketOS kernel | 5.16.10 |
| Unixbench Whet/Dhry score | 1657.2 |
| Flashing |
No data |
|---|---|
| USB Networking |
No data |
| Internal storage |
No data |
| SD card |
No data |
| Screen |
Works |
| Multimedia | |
| 3D Acceleration |
Works |
| Audio |
Works |
| Camera Flash |
No data |
| Connectivity | |
| WiFi |
Works |
| Bluetooth |
Works |
| Miscellaneous | |
| FDE |
No data |
| USB OTG |
Works |
| HDMI/DP |
No data |
| Sensors | |
| Magnetometer |
No data |
| Ambient Light |
No data |
| Proximity |
No data |
| Hall Effect |
No data |
| Haptics |
No data |
| Barometer |
No data |
Contributors
Users owning this device
How to enter flash mode
hold down usb-boot button on back of pcb
Expose embedded eMMC as a USB Mass Storage device
Fellow https://wiki.radxa.com/Zero/dev/maskrom#Enable_maskrom
Installation
1. Follow the steps on Installation_guide#Initialization
2. Choose the raspberry-pi4 device
3. Start the build process and install the completed image to a sdcard
$ pmbootstrap install --sdcard /dev/sdX
(replace /dev/sdX with the device for your sdcard or the emmc of it)
4. Place the sdcard into the Raspberry Pi and boot it
See also
- pmaports!2948 Initial merge request (First Attempt)
- pmaports!3865 Initial merge request (Second Attempt)