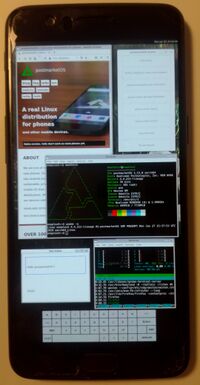
OnePlus 5 (oneplus-cheeseburger)
 | |
| Manufacturer | OnePlus |
|---|---|
| Name | 5 |
| Codename | oneplus-cheeseburger |
| Released | 2017 |
| Hardware | |
| Chipset | Qualcomm MSM8998 Snapdragon 835 |
| CPU |
4x 2.45 GHz Cortex-A73 4x 1.90 GHz Cortex-A53 |
| GPU | Adreno 540 |
| Display | 1080x1920 Optic AMOLED |
| Storage | 64 or 128 GB UFS 2.1 |
| Memory | 6 or 8 GB LPDDR4X RAM |
| Architecture | aarch64 |
| Software | |
Original software |
Android 7.1.1 (up to Android 9) on Linux 4.4 |
Extended version |
Android 7.1.1 (up to Android 9) on Linux 4.4 |
Mainline |
no |
| Device package |
|
| Kernel package |
|
Flashing |
Works
|
|---|---|
USB Networking |
Works
|
Battery |
Broken
|
Screen |
Works
|
Touchscreen |
Works
|
| Multimedia | |
3D Acceleration |
Broken
|
Audio |
Broken
|
Camera |
Broken
|
| Connectivity | |
WiFi |
Broken
|
Bluetooth |
Broken
|
GPS |
Untested
|
| Modem | |
Calls |
Broken
|
SMS |
Broken
|
Mobile data |
Broken
|
| Miscellaneous | |
FDE |
Broken
|
USB OTG |
Works
|
| Sensors | |
Accelerometer |
Untested
|
Contributors
- deathmist
Maintainer(s)
deathmist
Users owning this device
- Bdju (Notes: Android backup)
- Blitzwing (Notes: PMos just boot loops, so LineageOS it is)
- Cherryband
- CubeCat (Notes: Tinkering device, battery is pretty bad)
- Dartvader316 (Notes: 8/128 GB)
- Deathmist (Notes: 8/128 GB model)
- Double-hash (Notes: 8/128 GB, damaged usb-c port)
- EspiDev (Notes: 6/64 GB Plasma Mobile)
- Frost I7 (Notes: AlphaDroid 3.1)
- Index986 (Notes: 6/64GB postmarketOS unstable)
- Langfingaz (Notes: Running LineageOS 20)
- Mtek89 (Notes: Running LineageOS 19.1, girlfriend's phone)
- Poipa
- Rebel1725
- Recorvus (Notes: mainline)
- Win.exe
Fastboot mode
The OnePlus 5 uses fastboot as its flashing protocol.
To enter fastboot mode, hold while powering on the device. Release the button when FastBoot Mode can be seen on the display.
Installation
Unlocking the bootloader
If your bootloader is still locked at this point, you need to unlock it to proceed.
WARNING: Doing this WILL delete all your data on the device as a security precaution, so backup all your data before continuing!
There are plenty of guides online describing how to do this, but the run-down should be as follows:
- Enable
Developer optionsby tapping the build number 7 times inSettings>About - Go back and enter
Developer optionsto enable bothUSB DebuggingandOEM Unlocking - Install the
android-tools-fastbootorandroid-toolspackage depending on your machine's distro - Power down your OnePlus 5 & enter
fastbootmode using the instructions above this section - Open a terminal window and verify your phone is displayed under
fastboot devicesto continue - Run
fastboot oem unlockand follow the instructions on screen. Navigate menus with and select an option with the button. - Congrats, you should now have an unlocked bootloader on your device!
Setup build env & create flashables
Install pmbootstrap on your build machine and start following the steps below:
pmbootstrap init
pmbootstrap checksum linux-oneplus-cheeseburger
pmbootstrap build linux-oneplus-cheeseburger
pmbootstrap checksum device-oneplus-cheeseburger
pmbootstrap build device-oneplus-cheeseburger
pmbootstrap install
NOTICE: Both phosh and plasma-mobile are NOT working at all currently; this should be solved later by mainlining and using the freedreno DRM driver for graphics & mesa 3D acceleration.
Also note that running checksums/building can fail due to residue files! In these cases simply run the checksum command (again) for the package in question.
Flashing the device
To begin the flashing process, boot your device to fastboot mode (if you haven't already). The standard flashing process goes as follows:
pmbootstrap flasher flash_rootfs
pmbootstrap flasher flash_kernel
sudo fastboot reboot
If you instead want to install the pmOS root filesystem on userdata partition (around 56 or 120 GB) instead of the system partition (3 GB), run the following instead as the flash_rootfs command:
pmbootstrap flasher flash_rootfs --partition userdata
During e.g. rapid kernel development you can simply boot the new image instead of always flashing to the device boot partition like so:
pmbootstrap flasher boot
LEDs
Currently you can control a whole bunch of the LEDs present on the device via sysfs by writing values to their brightness control files as root:
Screen brightness (0-255) can be adjusted:
echo 255 > /sys/class/leds/lcd-backlight/brightness
The backlight for physical buttons can be enabled (1) or disabled (0):
echo 1 > /sys/class/leds/button-backlight/brightness
Notification light color & brightness (0-255) are controllable:
- Red:
echo 255 > /sys/class/leds/red/brightness - Green:
echo 255 > /sys/class/leds/green/brightness - Blue:
echo 255 > /sys/class/leds/blue/brightness
Control of the rear camera flashlight (/sys/class/leds/torch-light*/brightness) seems to be broken via sysfs anyway right now.
Partition layout
oneplus5:~# fdisk -l -o Device,Start,End,Sectors,Size,Name /dev/sda
oneplus5:~# fdisk -l -o Device,Start,End,Sectors,Size,Name /dev/sdb
oneplus5:~# fdisk -l -o Device,Start,End,Sectors,Size,Name /dev/sdc
oneplus5:~# fdisk -l -o Device,Start,End,Sectors,Size,Name /dev/sdd
oneplus5:~# fdisk -l -o Device,Start,End,Sectors,Size,Name /dev/sde
oneplus5:~# fdisk -l -o Device,Start,End,Sectors,Size,Name /dev/sdf
Links
- pmaports!908 Initial merge request
- Device package
- Kernel package
- LineageOS downstream kernel fork