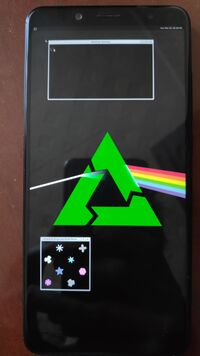
Xiaomi Redmi Note 5 Pro (xiaomi-whyred)
Appearance
 Xiaomi Redmi Note 5 | |
| Manufacturer | Xiaomi |
|---|---|
| Name | Redmi Note 5 |
| Codename | xiaomi-whyred |
| Released | 2018 |
| Hardware | |
| Chipset | Qualcomm SDM636 Snapdragon 636 |
| CPU | Octa-core Kryo 260 1.8 GHz |
| GPU | Adreno 509 |
| Display | 2160x1080 (403 PPI) IPS |
| Storage | 64 GB |
| Memory | 4/6 GB |
| Architecture | aarch64 |
| Software | |
Original software The software and version the device was shipped with. |
Android 9 |
Extended version The most recent supported version from the manufacturer. |
Android 9 |
| postmarketOS | |
Mainline Instead of a Linux kernel fork, it is possible to run (Close to) Mainline. |
no |
pmOS kernel The kernel version that runs on the device's port. |
4.4.78 |
| Device package |
|
| Kernel package |
|
Flashing It is possible to flash the device with pmbootstrap flasher. |
Untested
|
|---|---|
USB Networking After connecting the device with USB to your PC, you can connect to it via telnet (initramfs) or SSH (booted system). |
Works
|
Battery Charging and battery level reporting works |
Untested
|
Screen Display works. Ideally with sleep mode and brightness control. |
Works
|
Touchscreen |
Untested
|
| Multimedia | |
3D Acceleration |
Untested
|
Audio Audio playback, microphone, headset and buttons. |
Untested
|
Camera |
Untested
|
| Connectivity | |
WiFi |
Untested
|
Bluetooth |
Untested
|
GPS |
Untested
|
| Modem | |
Calls |
Untested
|
SMS |
Untested
|
Mobile data |
Untested
|
| Miscellaneous | |
FDE Full disk encryption and unlocking with unl0kr. |
Untested
|
| Sensors | |
Accelerometer Auto screen rotation works in desktops e.g. Phosh or Plasma Mobile |
Untested
|
Contributors
- javabird25
Maintainer(s)
- javabird25
Users owning this device
- AAT596 (Notes: LineageOS 18.1, audio broken, internal speaker still works)
- Alexeymin (Notes: Test subject #3)
- Csoftware (Notes: Not working Wayland, Touch and Display is broken, controlled by usb otg mouse)
- Devajithvs (Notes: Possible Future Test subject)
- Fireman112 (Notes: Daily driver)
- ItsVixano (Notes: Requires USB charger port replacement)
- RedVelvetCake11 (Notes: Main device, crDroid 12 Beta)
- Seebz (Notes: pmOS, no battery)
- TheMooskyFish (Notes: Old Phone - Testing Device)
- Uvraj
- Vincele (Notes: LOS 18.1, sports activity tracker, unlocked)
- ZeroCool32 (Notes: runs pmos, modem doesn't work)
How to enter flash mode
- Turn off the device
- Press Power+Volume Down to enter fastboot
Installation
| CAUTION: Flashing any image with antirollback index lower than 4 (Android 8 or lower, for example) could potentially brick your device due to Anti-rollback protection. See a related XDA Developers post for more information. |
Here's how to boot pmOS via fastboot:
- Install to a SD card with
pmbootstrap install --sdcard=/dev/sdX - Insert the SD card into the device
- Connect the device to your PC
- Enter the fastboot mode
- In order to boot an image with fastboot, an 8-Kb image of zeros should be flashed to the
antirbpasspartition every time we want to usepmbootstrap flasher bootorfastboot boot. Create an image if you haven't done that already:$ dd if=/dev/zero of=dummy.img bs=8K count=1
- Flash the freshly created
dummy.imgto theantirbpasspartition:$ fastboot flash antirbpass dummy.img
- Finally, boot pmOS:
$ pmbootstrap flasher boot
See also
- pmaports!1088 Initial merge request