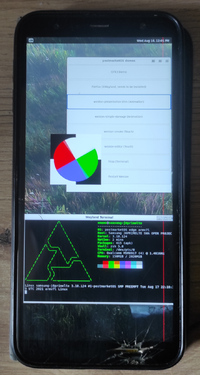
Samsung Galaxy J6 Plus (samsung-j6primelte)
Appearance
 Galaxy J6+ running Weston | |
| Manufacturer | Samsung |
|---|---|
| Name | Galaxy J6+ |
| Codename | samsung-j6primelte |
| Released | 2018 |
| Hardware | |
| Chipset | Qualcomm MSM8917 Snapdragon 425 |
| CPU | Quad-core 1.4 GHz Cortex-A53 |
| GPU | Adreno 308 |
| Display | 720x1480 IPS |
| Storage | 32 or 64 GB |
| Memory | 3 or 4 GB |
| Architecture | armv7 |
| Software | |
| Original software | Android 8.1 (upgradable to Android 10) |
| postmarketOS | |
| Category | testing |
| Pre-built images | no |
| Mainline | no |
| Flashing |
Works |
|---|---|
| USB Networking |
Works |
| Internal storage |
No data |
| SD card |
No data |
| Battery |
Partial |
| Screen |
Works |
| Touchscreen |
Works |
| Multimedia | |
| 3D Acceleration |
Broken |
| Audio |
Partial |
| Camera |
No data |
| Camera Flash |
No data |
| Connectivity | |
| WiFi |
Works |
| Bluetooth |
No data |
| GPS |
No data |
| NFC |
No data |
| Modem | |
| Calls |
No data |
| SMS |
No data |
| Mobile data |
No data |
| Miscellaneous | |
| FDE |
No data |
| USB OTG |
No data |
| HDMI/DP |
No data |
| Sensors | |
| Accelerometer |
No data |
| Magnetometer |
No data |
| Ambient Light |
No data |
| Proximity |
No data |
| Hall Effect |
No data |
| Haptics |
No data |
| Barometer |
No data |
Contributors
Users owning this device
How to enter flash mode
- Turn off your Galaxy J6+.
- Hold the Volume Down and Up buttons, and plug in a USB cable to a computer.
- Let go of the Volume buttons once you see the download mode confirmation menu.
Installation
Warning: This will not work unless your pmaports repository is the device/samsung-j6primelte branch in the fork. |
- Run
pmbootstrap init. Make sure you set the manufacturer tosamsung, and the codename toj6primelte. - Run
pmbootstrap build device-samsung-j6primelte, and drink some coffee, this will take a while. - Run
pmbootstrap install. - Run
pmbootstrap export. - Reboot to download mode using the steps above.
- If you want to install the rootfs to system, run
heimdall flash --BOOT /tmp/postmarketOS-export/boot.img-samsung-j6primelte --SYSTEM /tmp/postmarketOS-export/samsung-j6primelte.img. - If you want to install the rootfs to userdata instead for more disk space, run
heimdall flash --BOOT /tmp/postmarketOS-export/boot.img-samsung-j6primelte --USERDATA /tmp/postmarketOS-export/samsung-j6primelte.img.
- If you want to install the rootfs to system, run
Entering SSH
- Plug in your phone to your computer. It should show up as a USB RNDIS host.
- Check what the RNDIS host is registered as using the
ip linkcommand. In my case, it'senp0s20f0u3. - Run
sudo ip link set enp0s20f0u3 address 02:01:02:03:04:08, replacingenp0s20f0u3with the output from step 2. - You should be now able to SSH to your phone via
ssh user@172.16.42.1.
What doesn't work
- Hardware acceleration is broken due to no /dev/dri/, there's only /dev/fb0 (and /dev/fb1, but it's not used as the main display).
- charging-sdl doesn't work due to DirectFB crashing with:
(!) DirectFB/FBDev: Could not disable console acceleration!
    --> Invalid argument
(!) DirectFB/Core: Could not initialize 'system_core' core!
- ALSA sees the audio devices but can't manage them (we need to xml2uml the mixer_paths.xml most likely)
Notes
- Wi-Fi works only with the firmware blobs (not in pmaports upstream yet!)
- Audio partially works only with the firmware blobs (ditto)
See also
- pmaports!2444 Initial merge request
- https://gitlab.com/omaemae/pmaports j6primelte pmaports fork
- https://github.com/omaemae/pmos-j6primelte-firmware-blobs proprietary firmware blobs, necessary for Wi-Fi