Samsung Galaxy J7 Pro (samsung-j7y17lte)
| WARNING: This port uses proprietary vendor firmware blobs (H-VENDOR.zip). If you wish to not use these, you are free to do so, at the cost of reducing the device functionality. |
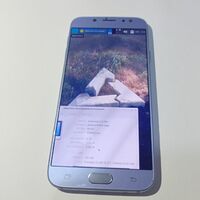
 J7 Pro running on XFCE4 desktop environment. | |
| Manufacturer | Samsung |
|---|---|
| Name | Galaxy J7 Pro |
| Codename | samsung-j7y17lte |
| Released | 2017 |
| Type | handset |
| Hardware | |
| Chipset | Samsung Exynos 7870 Octa |
| CPU | Octa-core 1.6 GHz Cortex-A53 |
| GPU | Mali-T830 MP1 |
| Display | 1080 x 1920 Super AMOLED |
| Storage | 16/32/64 GB |
| Memory | 3 GB |
| Architecture | aarch64 |
| Software | |
| Original software | Android |
| Original version | 7.0 |
| Extended version | 9.0 |
| postmarketOS | |
| Category | testing |
| Pre-built images | no |
| Mainline | no |
| Flashing |
Partial |
|---|---|
| USB Networking |
Works |
| Internal storage |
No data |
| SD card |
No data |
| Battery |
Works |
| Screen |
Works |
| Touchscreen |
Works |
| Multimedia | |
| 3D Acceleration |
Broken |
| Audio |
Broken |
| Camera |
Broken |
| Camera Flash |
No data |
| Connectivity | |
| WiFi |
Works |
| Bluetooth |
Broken |
| GPS |
Broken |
| NFC |
Broken |
| Modem | |
| Calls |
No data |
| SMS |
No data |
| Mobile data |
Broken |
| Miscellaneous | |
| FDE |
No data |
| USB OTG |
Works |
| Sensors | |
| Accelerometer |
No data |
| Proximity |
No data |
| Haptics |
No data |
Samsung Galaxy J7 Pro, also known Samsung Galaxy J7 2017, is an Exynos 7870 device released by Samsung in 2016.
Contributors
- Buildingat90degreesC (Porting postmarketOS)
Users owning this device
- Buildingat90degreesC
- Wann (Notes: without screen)
How to enter flash mode
When the phone is powered off, hold the , and buttons to boot into download mode. A turquoise colored screen will appear, asking for confirmation. Press to confirm. Your device is ready for flashing via a front-end such as Odin or Heimdall.
To boot into recovery, hold the , and buttons.
| Download mode performs some checks with the provided images before flashing it for partitions except BOOT. The images generated by pmbootstrap do not pass those checks, and thus it isn't possible to flash the rootfs using download mode. |
Installation
Prerequisites
Make sure your phone:
- Has its bootloader unlocked.
- Has a custom recovery installed (such as TWRP)
- Created the Vendor partition and flashed H-Vendor zip before
Preparation
Download the repartition script here for creating Vendor partition: https://xdaforums.com/t/tool-7870-universal-repartition-script-for-vendor-support.4143541/
Flash the zip file. It will automatically reboot to recovery.
Now in recovery again, Go to Advanced Wipe, wipe system, cache and vendor and format data. (If you can't format any of those partitions tap on the Cache partition only, for example, and go to Repair or Change File System > Change File System > EXT2 and then swap to change and then go back to Advanced Wipe, Repair or Change File System > Change File System > and then this time EXT4 and swap to change again. Repeat this step to any partition you haven't been able to format.)
Download the H-Vendor here: https://xdaforums.com/t/treble-10-0-arm64-h-vendor-v1-0.4116271/
This one is important. Flash the zip BEFORE flashing the postmarketOS zip file on TWRP
Choose the following in the pmbootstrap init wizard:
Vendor: samsung
Device codename: j7y17lte
User interface: xfce4
xfce4 is tested and works out of the box. Other UIs are not guaranteed to work.
gnome-mobile comes with wayland as its dependency. Since wayland doesn't run in downstream kernels, xorg needs to be installed.
Extra packages: xorg-server
To proceed with the installation run:
$ pmbootstrap install --android-recovery-zip
After the installation process is completed, get your phone booted into recovery, and enable sideloading via adb. Then run:
$ pmbootstrap flasher --method=adb sideload
Or you can export the zip file and install it directly via TWRP.
$ pmbootstrap export
Then nagivate to /tmp/postmarketOS/ You'll see the recovery zip there. But you need to right click it and open the real location of it because it is just a link.
Transfer the zip file to your phone.
This will begin installing pmbootstrap prepare a recovery zip file. By default, the rootfs is flashed in the SYSTEM partition of the device.
In order to change the default partition (let's say, the USERDATA partition), append --recovery-install-partition=USERDATA to the above command.
The recovery zip gets flashed to your device. Reboot to system when it's done.
| WARNING: Do not reboot to system until the TWRP is done processing script files and there's no output coming like "Setting tw_app_prompt to 0". If you do then the the recovery will not write the changes made. |
Notes on WiFi
For now the device doesn't connect to the WiFi via Network Manager. You'll need to use wpa_supplicant.
Refer to https://wiki.postmarketos.org/wiki/WiFi#Using_wpa_supplicant