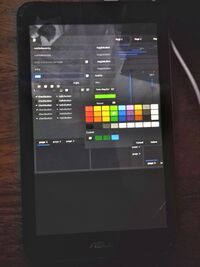
ASUS MeMO Pad 7 (asus-me176c)
 asus-me176cx running postmarketOS | |
| Manufacturer | Asus |
|---|---|
| Name | MeMo Pad 7 |
| Codename | asus-me176c(x) |
| Released | 2014? |
| Hardware | |
| Chipset | Intel BayTrail T Z3745 |
| CPU | Intel® Atom™ CPU Z3745 @ 1.33GHz |
| GPU | Atom Processor Z36xxx/Z37xxx Series Graphics & Display |
| Display | 7" 800x1280 IPS LCD |
| Storage | 8/16 GB |
| Memory | 1 GB |
| Architecture | x86_64 |
| Software | |
| Original software | Android 4.4 kitkat (updated to 5.0 lollipop + UEFI) |
| postmarketOS | |
| Category | testing |
| Pre-built images | no |
| Mainline | partial |
| Flashing |
Broken |
|---|---|
| USB Networking |
Works |
| Internal storage |
No data |
| SD card |
No data |
| Battery |
Works |
| Screen |
Works |
| Touchscreen |
Works |
| Multimedia | |
| 3D Acceleration |
Works |
| Audio |
Works |
| Camera |
Broken |
| Camera Flash |
No data |
| Connectivity | |
| WiFi |
Works |
| Bluetooth |
Works |
| GPS |
Broken |
| NFC |
No data |
| Modem | |
| Calls |
Broken |
| SMS |
Broken |
| Mobile data |
Broken |
| Miscellaneous | |
| FDE |
No data |
| USB OTG |
No data |
| HDMI/DP |
No data |
| Sensors | |
| Accelerometer |
No data |
| Magnetometer |
No data |
| Ambient Light |
No data |
| Proximity |
No data |
| Hall Effect |
No data |
| Haptics |
No data |
| Barometer |
No data |
Contributors
Mis012
lambdadroid (https://github.com/me176c-dev/)
Maintainer(s)
Mis012 (possibly will ask lambdadroid anyway)
Installation
0. !!! make sure you have UEFI firmware, which was supplied as part of official lollipop 5.0 update !!!
1. obtain a bootloader that doesn't suck (i.e. this one: https://forum.xda-developers.com/memo-pad-7/orig-development/bootloader-me176c-boot-asus-memo-pad-7-t3780225), but don't install it yet
2. obtain the rootfs image, the kernel and the initramfs by following [Installation_guide], but instead of running `$ pmbootstrap flasher`, run `$ pmbootstrap export`.
3.0 before flashing the bootloader, mount the esp.img partition image and copy /tmp/postmarketOS-export/initramfs-asus-me176cx and /tmp/postmarketOS-export/vmlinuz-asus-me176cx to the root (alongside e.g. EFI folder)
3.1 create [esp.img]/loader/entries/postmarketOS.conf and change it's contents like so:
title    postmarketOS
linux    /vmlinuz-asus-me176cx
initrd   /initramfs-asus-me176cx
options  console=tty0
you can add mmc_block.perdev_minors=XX to options if you have added any partitions beyond the original 16
3.2 open [esp.img]/loader/loader.conf, and change "default android" to "default postmarketOS"
4. umount esp.img and flash it according to the xda guide
5. while in droidboot, use
fastboot flash data asus-me176cx.imgto flash rootfs to the device
6. reboot - now you should be booted into postmarketOS
note that charging will be done by whatever android ROM you had previously. I haven't tested if the ROM tries to do anything with data partition at this stage. If you want to be sure, change the partlabel so android can't find it. You can also dualboot (see below)
I will probably look into charging-sdl in the future
DualBoot
1. remove rootfs from data partition
2. put rootfs to system partition
3. boot into postmarketOS
4. using your favorite linux tools, shrink the data partition and add a new partition with any partlabel you like (e.g postmarketOS)
5. remove rootfs from system partition
6. put rootfs on the new partition
7. put android back on system partition
8. you can now boot into android by holding volume down on bootup and selecting it from the menu
See also
lambdadroid's mainline based kernel tree - https://github.com/me176c-dev/me176c-kernel/tree/arch-4.19
GPS - https://github.com/me176c-dev/android_device_asus_K013/issues/48
Camera - https://github.com/me176c-dev/android_device_asus_K013/issues/47