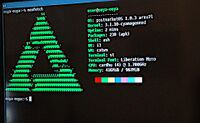
Ouya (ouya-ouya)
 Ouya | |
| Manufacturer | Ouya, Inc. |
|---|---|
| Name | Ouya |
| Codename | ouya_1_1 |
| Released | 2013 |
| Hardware | |
| Chipset | Nvidia Tegra 3 |
| CPU | 4x 1.7 GHz Cortex-A9 |
| GPU |
Nvidia GeForce ULP 520 MHz (12.48 GFLOPS) |
| Display | 1x HDMI |
| Storage | 8/16 GB |
| Memory | 1 GB |
| Architecture | armv7 |
| Software | |
| Original software | Android |
| postmarketOS | |
| Category | testing |
| Pre-built images | no |
| Mainline | partial |
| Unixbench Whet/Dhry score | 1450.2 |
| Flashing |
Partial |
|---|---|
| USB Networking |
Works |
| Internal storage |
No data |
| SD card |
No data |
| Multimedia | |
| 3D Acceleration |
No data |
| Audio |
No data |
| Camera Flash |
No data |
| Connectivity | |
| WiFi |
Works |
| Bluetooth |
Works |
| NFC |
No data |
| Miscellaneous | |
| FDE |
Partial |
| USB OTG |
No data |
| HDMI/DP |
No data |
| Sensors | |
| Magnetometer |
No data |
| Ambient Light |
No data |
| Proximity |
No data |
| Hall Effect |
No data |
| Haptics |
No data |
| Barometer |
No data |
Contributors
- rendeko
- ryang2678 (Decatf)
- ollieparanoid
Maintainer(s)
- rendeko
Kernel
We avoid flashing directly to the device as a corrupted kernel would irreversibly brick the Ouya due to the locked bootloader. We use a tool called Ouya BootMenu (source) that allows us to run the postmarketOS kernel through a kexec method. This implements an extra failsafe to prevent bricking and in theory allows dualbooting and kernel development.
Audio
- Audio on the downstream kernel is untested.
- Audio on the mainline kernel is not working.
In the mainline kernel, the hdmi driver is located in drivers/video/tegra/dc/hdmi.c. This implementation reads the HDMI audio format a scratch register when the hdmi interrupt is asserted. The Ouya does not appear to trigger an interrupt. The scratch register does not appear to have valid data either. The downstream kernel does not appear to use this method to configure audio. Further examination of the downstream kernel to determine how audio is configured.
Ethernet
A random MAC address is generated by the kernel at each boot. This is because the smsc9500 Ethernet device does not have a valid mac address stored in EEPROM. To set a consistent MAC address, create the file /etc/udev/rules.d/99-mac-address.rules with the following udev rule.
ACTION=="add", SUBSYSTEM=="net", KERNEL=="eth0", RUN+="/sbin/ip link set dev %k address f6:23:f0:42:98:cf"
Radio
- The Ouya uses a BCM4330 radio chip for wifi and bluetooth. The downstream and mainline kernel use the same wifi firmware. The firmware shipped with the device is the only known firmware to work with the Ouya. The BCM4330 firmware in
linux-firmwaredoes not work.
- Two later releases (the completely white special edition and completely black 2nd generation) allegedly use a BCM4334 chipset. This needs to be implemented and tested at a future date.
Display Resolution
On the mainline kernel, display resolutions above 1280x720 are glitchy. The GPU is dependent on memory bandwidth but EMC scaling is not implemented in mainline. The Ouya bootloader sets the memory to 400 Mhz. Higher display resolutions work a bit better when the memory is set to 800Mhz but it is still glitchy.
Other Notes
- Splash screen doesn't appear
- Hildon doesn't work?
- USB booting needs to be tested
Installation
How to enter flash mode
1. Connect Ouya to PC
2. Use adb reboot recovery to enter recovery (or adb reboot bootloader to enter bootloader for fastboot commands)
pmbootstrap
| TODO: Work in progress, may be wrong. Only attempt for development |
1. Flash CWM and Ouya BootMenu.
2. Turn on Ouya, then press the power button many times until it scrolls to Bootloader, and then wait until the boot menu disappears.
3. Run the following using pmbootstrap:
$ pmbootstrap init
$ pmbootstrap install --no-fde
$ pmbootstrap export
$ pmbootstrap flasher flash_rootfs
| WARNING: This will create two partitions under system partition instead of one which won't allow you to use Normal Boot option in Ouya BootMenu |
4. Reboot Ouya, then press the power button many times until it scrolls to Recovery, and then wait until CWM appears.
6. Using CWM menu options, mount /data partition.
7. Copy postmarketOS boot.img to /sdcard as altboot.img:
$ adb push /tmp/postmarketOS-export/boot.img-ouya-ouya /sdcard/altboot.img
8. Reboot Ouya, then press the power button many times until it scrolls to Alternate Boot, and then wait until postmarketOS appears.
Using data partition as rootfs
| WARNING: Flashing to the userdata partition will overwrite all data on the device. Backup all data to another device before proceeding. |
It is much more usable to flash rootfs to the data partition which is around 5.7GB in size.
Flashing to the data partition
Specify the partition to flash rootfs to with the --partition argument:
$ pmbootstrap flasher flash_rootfs --partition userdata
Copy postmarketOS boot.img to /system:
$ adb push /tmp/postmarketOS-export/boot.img-ouya-ouya /system/boot.img
Updating the kernel
When the apk package manager updates the kernel package (e.g. linux-ouya-ouya or linux-ouya-ouya-mainline) then the boot.img will be regenerated with the new kernel. Run the following commands on device to install the updated boot.img:
$ mkdir /system
$ mount /dev/mmcblk1p3 /system
$ cp /boot/boot.img-ouya-ouya /system/boot.img
Links
- Ouya BootMenu (source)
- CWM
- CyanogenMod documentation blog
- pmaports!269 Add mainline based kernel for Ouya