Next Thing Co. CHIP (ntc-chip): Difference between revisions
Appearance
ntc-chip: Add info on how to enter flash mode |
Add flashing instructions |
||
| Line 68: | Line 68: | ||
* Fastboot mode: used to flash rootfs | * Fastboot mode: used to flash rootfs | ||
To enter FEL mode: | |||
To enter '''FEL''' mode: | |||
* Connect the FEL and GND pins with a jumper cable | * Connect the FEL and GND pins with a jumper cable | ||
* Power on the CHIP | * Power on the CHIP | ||
To enter Fastboot mode: | To enter '''Fastboot''' mode: | ||
* Connect an serial (UART) USB adapter to UART1-TX, UART1-RX and GND | * Connect an serial (UART) USB adapter to UART1-TX, UART1-RX and GND | ||
* Power on the CHIP | * Power on the CHIP | ||
| Line 78: | Line 79: | ||
* On the console type `fastboot 0` | * On the console type `fastboot 0` | ||
== | == Create the UBIfs image == | ||
<!-- add more sections below as necessary, e.g. WiFi, photos, ... --> | <!-- add more sections below as necessary, e.g. WiFi, photos, ... --> | ||
* Configure the installation | |||
<syntaxhighlight lang="shell-session"> | |||
$ pmbootstrap init | |||
</syntaxhighlight> | |||
* Build the system | |||
<syntaxhighlight lang="shell-session"> | |||
$ pmbootstrap install | |||
</syntaxhighlight> | |||
In `workdir/chroot_rootfs_ntc-chip` there is the rootfs for your ntc-chip | |||
The following commands needs to be launched from your pmbootstrap workdir | |||
* Copy dtb from linux-ntc-chip | |||
<syntaxhighlight lang="shell-session"> | |||
$ sudo mkdir chroot_rootfs_ntc-chip/boot/dtbs | |||
$ sudo cp cache_git/pmaports/device/testing/linux-ntc-chip/sun5i-r8-chip.dtb chroot_rootfs_ntc-chip/boot/dtbs/ | |||
</syntaxhighlight> | |||
* Rename the linux kernel | |||
<syntaxhighlight lang="shell-session"> | |||
$ sudo cp chroot_rootfs_ntc-chip/boot/vmlinuz-ntc-chip chroot_rootfs_ntc-chip/boot/zImage | |||
</syntaxhighlight> | |||
Install mtd-utils from your distro repositories e.g. `pacman -S mtd-utils` | |||
* Create the UBIfs image | |||
<syntaxhighlight lang="shell-session"> | |||
$ mkdir ubi | |||
$ sudo mkfs.ubifs -m 16384 -e 0x1f8000 -c 2000 -r chroot_rootfs_ntc-chip ubi/ubifs.img | |||
$ sudo chown youruser:youruser ubi/ubifs.img | |||
$ ubinize -o ubi/ubi.img -m 16384 -p 2MiB -s 16384 cache_git/pmaports/device/testing/device-ntc-chip/ubinize.cfg | |||
$ img2simg ubi/ubi.img ubi/ubi.img.sparse 2097152 | |||
</syntaxhighlight> | |||
== Flash the UBIfs image == | |||
* Enter fastboot mode as described above | |||
* On your computer | |||
<syntaxhighlight lang="shell-session"> | |||
$ sudo fastboot erase UBI | |||
$ sudo fastboot flash UBI ubi/ubi.img.sparse | |||
$ sudo fastboot reboot | |||
</syntaxhighlight> | |||
== See also == | == See also == | ||
Revision as of 08:49, 25 March 2020
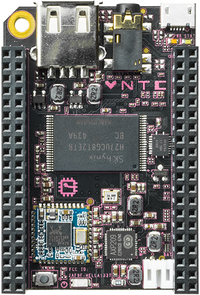
 Next Thing Co. CHIP | |
| Manufacturer | Next Thing Co. |
|---|---|
| Name | CHIP |
| Codename | ntc-chip |
| Released | 2015 |
| Hardware | |
| Chipset | Allwinner R8 |
| CPU | 1x 1.0 GHz Cortex-A8 |
| GPU | Mali 400 MP1 |
| Display | Composite video |
| Storage | 8GB MLC NAND |
| Memory | 512 MB DDR3 |
| Architecture | armv7 |
| Software | |
| Original software | Debian on Linux 4.4 |
| postmarketOS | |
| Category | testing |
| Pre-built images | no |
| Flashing |
No data |
|---|---|
| USB Networking |
No data |
| Internal storage |
No data |
| SD card |
No data |
| Battery |
No data |
| Screen |
No data |
| Multimedia | |
| 3D Acceleration |
No data |
| Audio |
No data |
| Camera Flash |
No data |
| Connectivity | |
| WiFi |
No data |
| Bluetooth |
No data |
| NFC |
No data |
| Miscellaneous | |
| FDE |
No data |
| USB OTG |
No data |
| HDMI/DP |
No data |
| Sensors | |
| Accelerometer |
No data |
| Magnetometer |
No data |
| Ambient Light |
No data |
| Proximity |
No data |
| Hall Effect |
No data |
| Haptics |
No data |
| Barometer |
No data |
Contributors
- Symmetrist
Maintainer(s)
- Symmetrist
Users owning this device
How to enter flash mode
The CHIP has two different flashing modes:
- FEL mode: used to flash bootloader and rootfs
- Fastboot mode: used to flash rootfs
To enter FEL mode:
- Connect the FEL and GND pins with a jumper cable
- Power on the CHIP
To enter Fastboot mode:
- Connect an serial (UART) USB adapter to UART1-TX, UART1-RX and GND
- Power on the CHIP
- Press enter during boot up to access the U-Boot console
- On the console type `fastboot 0`
Create the UBIfs image
- Configure the installation
$ pmbootstrap init
- Build the system
$ pmbootstrap install
In `workdir/chroot_rootfs_ntc-chip` there is the rootfs for your ntc-chip The following commands needs to be launched from your pmbootstrap workdir
- Copy dtb from linux-ntc-chip
$ sudo mkdir chroot_rootfs_ntc-chip/boot/dtbs
$ sudo cp cache_git/pmaports/device/testing/linux-ntc-chip/sun5i-r8-chip.dtb chroot_rootfs_ntc-chip/boot/dtbs/
- Rename the linux kernel
$ sudo cp chroot_rootfs_ntc-chip/boot/vmlinuz-ntc-chip chroot_rootfs_ntc-chip/boot/zImage
Install mtd-utils from your distro repositories e.g. `pacman -S mtd-utils`
- Create the UBIfs image
$ mkdir ubi
$ sudo mkfs.ubifs -m 16384 -e 0x1f8000 -c 2000 -r chroot_rootfs_ntc-chip ubi/ubifs.img
$ sudo chown youruser:youruser ubi/ubifs.img
$ ubinize -o ubi/ubi.img -m 16384 -p 2MiB -s 16384 cache_git/pmaports/device/testing/device-ntc-chip/ubinize.cfg
$ img2simg ubi/ubi.img ubi/ubi.img.sparse 2097152
Flash the UBIfs image
- Enter fastboot mode as described above
- On your computer
$ sudo fastboot erase UBI
$ sudo fastboot flash UBI ubi/ubi.img.sparse
$ sudo fastboot reboot
See also
- pmaports!1098 Initial merge request
- Sunxi wiki page
- Wikipedia wiki page