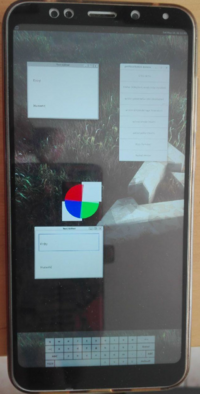
Xiaomi Redmi 5 Plus (xiaomi-vince): Difference between revisions
Appearance
No edit summary |
|||
| Line 51: | Line 51: | ||
== Users owning this device == | == Users owning this device == | ||
{{Device owners}} | {{Device owners}} | ||
SsNiPeR1 | |||
== How to enter flash mode == | == How to enter flash mode == | ||
Revision as of 19:23, 13 May 2021
 Xiaomi Redmi Note 5 / 5 Plus | |
| Manufacturer | Xiaomi |
|---|---|
| Name |
Redmi Note 5 / 5 Plus |
| Codename | xiaomi-vince |
| Released | 2017 |
| Hardware | |
| Chipset | Qualcomm MSM8953 Snapdragon 625 |
| CPU | Octa-core Cortex-A53 2 GHz |
| GPU | Adreno 506 |
| Display | 2160x1080 (403 PPI) IPS |
| Storage | 32/64 GB |
| Memory | 3/4 GB |
| Architecture | aarch64 |
| Software | |
| Original software | Android 8.1 |
| postmarketOS | |
| Category | testing |
| Pre-built images | no |
| Mainline | no |
| postmarketOS kernel | 4.9.257 |
| Flashing |
Works |
|---|---|
| USB Networking |
Works |
| Internal storage |
No data |
| SD card |
No data |
| Battery |
Works |
| Screen |
Works |
| Touchscreen |
Works |
| Multimedia | |
| 3D Acceleration |
Broken |
| Audio |
Works |
| Camera |
Broken |
| Camera Flash |
No data |
| Connectivity | |
| WiFi |
Works |
| Bluetooth |
Broken |
| GPS |
Broken |
| NFC |
No data |
| Modem | |
| Calls |
Broken |
| SMS |
Broken |
| Mobile data |
Broken |
| Miscellaneous | |
| FDE |
No data |
| USB OTG |
No data |
| HDMI/DP |
No data |
| Sensors | |
| Accelerometer |
Broken |
| Magnetometer |
No data |
| Ambient Light |
No data |
| Proximity |
No data |
| Hall Effect |
No data |
| Haptics |
No data |
| Barometer |
No data |
Maintainer(s)
- M0Rf30
Users owning this device
- 4PERTURE
- Bazsalanszky
- Bczeman
- Kasesag (Notes: Runs pmOS, main experimental Mobile Linux device.)
- KenOokamiHoro (Notes: 4+64GB variant, Dual boot with Pixel Experience 12)
- M0Rf30
- Tecncr
- Tfuxu (Notes: Old daily driver, now used only for experimenting)
- V1M4dr0n (Notes: LOS main & pmOS on SDCard)
SsNiPeR1
How to enter flash mode
- Turn off the device
- Press + to enter fastboot
Installation
Here's how to boot pmOS via fastboot:
- Install to a SD card with
$ pmbootstrap install --sdcard=/dev/sdX
- Insert the SD card into the device
- Connect the device to your PC
- Enter the fastboot mode
- Finally, boot pmOS:
$ pmbootstrap flasher boot
or
- Enter the fastboot mode
- Flash system
$ pmbootstrap flasher flash_system
- Flash kernel
$ pmbootstrap flasher flash_kernel
- Finally, reboot into pmOS:
$ fastboot reboot
Audio
To enable audio you need to install triggerhappy. You can do it in many ways:
- At the first
$ pmbootstrap install
command appending
--add triggerhappy
or with
$ sudo apk add triggerhappy
on a running device
- On both cases you always need to enable the triggerhappy daemon with:
$ sudo rc-update add triggerhappy default
Fingerprint
Two drivers are available within downstream kernel
| Vendor | Model |
|---|---|
| Fingerprint Cards AB | FPC1020 |
| Goodix | GF3208 |
Sensors
| Type | Vendor | Model |
|---|---|---|
| Accelerometer / Gyroscope | STMicroelectronics | LSM6DS3 |
| Magnetometer / Compass | Asahi Kasei | AK09918 |
| Ambient Light | Liteon Opto | LTR579 ALSPS |
| Hall | ROHM Semiconductor | BU52061NVX |
See also
- pmaports!1249 Initial merge request
- ALSA msm8953-snd-card-mtp UCM
- Device package
- Kernel package