Samsung Galaxy S Advance (samsung-janice): Difference between revisions
Add mainlne installation instructions |
Remove downstream installation instructions |
||
| Line 44: | Line 44: | ||
Finally, just follow the [[Installation guide]]. | Finally, just follow the [[Installation guide]]. | ||
=== How drebrez made wifi work === | === How drebrez made wifi work === | ||
Revision as of 13:53, 29 January 2022
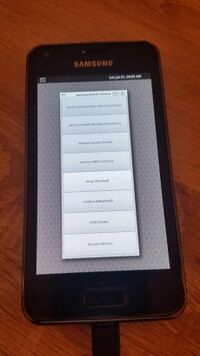
 Samsung Galaxy S Advance running Weston demos | |
| Manufacturer | Samsung |
|---|---|
| Name | Galaxy S Advance |
| Codename | samsung-janice |
| Released | 2012 |
| Hardware | |
| Chipset | [[ST-Ericsson NovaThor U8500]] |
| CPU | Dual-core 1.0 GHz Cortex-A9 |
| GPU | Mali-400 |
| Display | 480x800 AMOLED |
| Storage | 8/16 GB |
| Memory | 768 MB |
| Architecture | armv7 |
| Software | |
| Original software | Android 2.3.6 on Linux 2.6.35 |
| postmarketOS | |
| Category | testing |
| Pre-built images | no |
| Mainline | yes |
| Flashing |
Works |
|---|---|
| USB Networking |
No data |
| Internal storage |
No data |
| SD card |
No data |
| Battery |
No data |
| Screen |
Works |
| Touchscreen |
Works |
| Multimedia | |
| 3D Acceleration |
No data |
| Audio |
No data |
| Camera |
No data |
| Camera Flash |
No data |
| Connectivity | |
| WiFi |
No data |
| Bluetooth |
No data |
| GPS |
No data |
| NFC |
No data |
| Modem | |
| Calls |
No data |
| SMS |
No data |
| Mobile data |
No data |
| Miscellaneous | |
| FDE |
No data |
| USB OTG |
No data |
| HDMI/DP |
No data |
| Sensors | |
| Accelerometer |
No data |
| Magnetometer |
No data |
| Ambient Light |
No data |
| Proximity |
No data |
| Hall Effect |
No data |
| Haptics |
No data |
| Barometer |
No data |
Contributors
- drebrez
Installation
The mainline kernel can only be booted through U-Boot, not directly with the Samsung bootloader. U-Boot is installed as intermediate bootloader on the boot partition, so it does not replace the Samsung bootloader entirely. pmbootstrap can only support one bootloader configuration at the moment, which is why U-Boot is also recommended when installing the downstream kernel.
Boot into Download Mode using + + and follow follow the the NovaThor U8500 U-Boot installation instructions to install U-Boot.
Finally, just follow the Installation guide.
How drebrez made wifi work
- build the kernel module (dhd.ko for samsung-janice)
- get the vendor files for the Samsung U8500 devices
- load the module using insmod with the firmware_path and nvram_path parameters
insmod dhd.ko firmware_path=/etc/wifi/bcmdhd_sta.bin nvram_path=/etc/wifi/nvram_net.txt
- set a mac address
ifconfig wlan0 hw ether 01:02:03:04:05:06
- bring the interface up
ifconfig wlan0 up
- scan to find out what WiFi networks are detected
iw dev wlan0 scan
- connect to WPA/WPA2 WiFi network
wpa_passphrase wifi_ssid wifi_key >> /etc/wpa_supplicant.conf
- start wpa_supplicant to connect to the network
wpa_supplicant -B -D wext -i wlan0 -c /etc/wpa_supplicant.conf
- verify that you are indeed connected to the SSID
iw wlan0 link
- start udhcpc to get an ip address
udhcpc -b -i wlan0
Links
- Device package
- Kernel package
- Epirex's Kernel
- Epirex's vendor files
- Upstream devicetree in Torvalds' kernel tree
Photos
- Initramfs asking for the password via telnet
- postmarketOS demo menu (XWayland)
- Weston-terminal running in fullscreen mode