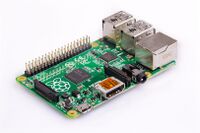
Raspberry Pi 1 / 2 (raspberry-pi): Difference between revisions
Appearance
m Maxnet moved page Raspberry Pi 1 & 2 to Raspberry Pi 1 & 2 (raspberry-pi): consistent naming device pages |
Daviewales (talk | contribs) →See also: Add link to forum summary of accelerated video status as of August 2021 |
||
| Line 68: | Line 68: | ||
* {{github|1501}} initial PR | * {{github|1501}} initial PR | ||
* {{MR|125|pmaports}} New device: Raspberry Pi Zero with Ethernet over USB enabled | * {{MR|125|pmaports}} New device: Raspberry Pi Zero with Ethernet over USB enabled | ||
* [https://forums.raspberrypi.com/viewtopic.php?f=67&p=1901014 Summary of accelerated video status] as of August 2021 | |||
[[Category:Devices]] | [[Category:Devices]] | ||
Revision as of 13:31, 13 June 2022
| WARNING: This device is not recommended for future use with postmarketOS due to its armhf architecture. Alpine Linux (the distribution that postmarketOS extends) pmaports#599 has been considering dropping it. The processor of the device may support the armv7 architecture. If so, you can modify the device package and change the architecture accordingly. |
 | |
| Manufacturer | Raspberry Pi Foundation |
|---|---|
| Name | Raspberry Pi 1 & 2 |
| Codename | raspberry-pi |
| Released | 2013 |
| Hardware | |
| Chipset |
[[Broadcom BCM2835 Broadcom BCM2836]] |
| CPU |
ARM1176JZF-S @ 700 MHz 4x ARM Cortex-A7 @ 900 MHz |
| GPU | Broadcom VideoCore IV |
| Display | HDMI port |
| Storage | MicroSDHC slot |
| Memory | 256/512/1024 MB |
| Architecture | armhf |
| Software | |
| Original software | Raspbian |
| postmarketOS | |
| Category | testing |
| Pre-built images | no |
| Mainline | yes |
| Unixbench Whet/Dhry score | 89.3 |
| Internal storage |
No data |
|---|---|
| SD card |
No data |
| Screen |
Works |
| Multimedia | |
| 3D Acceleration |
No data |
| Audio |
No data |
| Camera Flash |
No data |
| Connectivity | |
| Bluetooth |
No data |
| NFC |
No data |
| Miscellaneous | |
| FDE |
No data |
| USB OTG |
No data |
| HDMI/DP |
No data |
| Sensors | |
| Magnetometer |
No data |
| Ambient Light |
No data |
| Proximity |
No data |
| Hall Effect |
No data |
| Haptics |
No data |
| Barometer |
No data |
Contributors
Installation
1. Follow the steps on Installation_guide#Initialization
2. Choose the raspberry-pi device
3. Select the kernel for your Raspberry Pi version
[10:47:03] Which kernel do you want to use with your device?
[10:47:03] Available kernels (2):
[10:47:03] * rpi: Kernel for the Raspberry Pi 1
[10:47:03] * rpi2: Kernel for the Raspberry Pi 2
4. Start the build process and install the completed image to a sdcard
$ ./pmbootstrap.py install --sdcard /dev/sdX
(replace /dev/sdX with the device for your sdcard)
5. Place the sdcard into the Raspberry Pi and boot it
See also
- The Raspberry Pi has a pre-existing port of Alpine Linux
- It should be possible to convert the pre-existing RPi Alpine install to a pmOS install.
- #1137 Testing out Hildon and XFCE4 (other UIs did not work at all?) on Raspberry Pi after converting the Alpine installation
- rpi-open-firmware - a Free Software firmware for the Pi.
- #1501 initial PR
- pmaports!125 New device: Raspberry Pi Zero with Ethernet over USB enabled
- Summary of accelerated video status as of August 2021